How To Lenovo Warranty Check? Step-By-Step Process To Check Lenovo Warranty
No matter what device you have, using it under a warranty period will always make you feel secure using it. This is because you know that if any damage or technical issue befalls your device, you can easily get it fixed in no time – for free. This is why it’s mandatory for Lenovo product users to learn how to conduct a Lenovo Warranty check.
If you are a Lenovo product user, you are in the right place. Read this post till the end to learn how to check your Lenovo product warranty status and how to extend it.
Why Should You Lenovo Warranty Check?
Conducting a Lenovo Warranty Check is a pretty essential function that all Lenovo product users should remember. This is because whenever you buy a new Lenovo product, it automatically comes with a one-year warranty period.
Therefore, since you can avail of free repairs and replacements in that period, you should know its exact start and end date. This allows you to get free service if your device faces issues as long as it’s under your warranty period. This is an essential part of your smartphone buying guide.
Therefore, the primary benefits of conducting a Lenovo Warranty check (similar to an Apple Warranty check) are:
- The most basic and essential benefit is that you get to check your Lenovo Warranty period. This lets you get free repairs and replacement services. If you see that you have crossed your warranty period, or you are about to, you can instantly extend your warranty period online!
- If you wish to file a claim against Lenovo due to defective products, you can do so as long as your device is still under its warranty period. You can do the same if you own a Nothing Phone 2 or a LG Stylo 6 as well!
How To Lenovo Warranty?
If you wish to Lenovo Warranty Check US, then there are two options to do so.
1. Lenovo Warranty Check Online
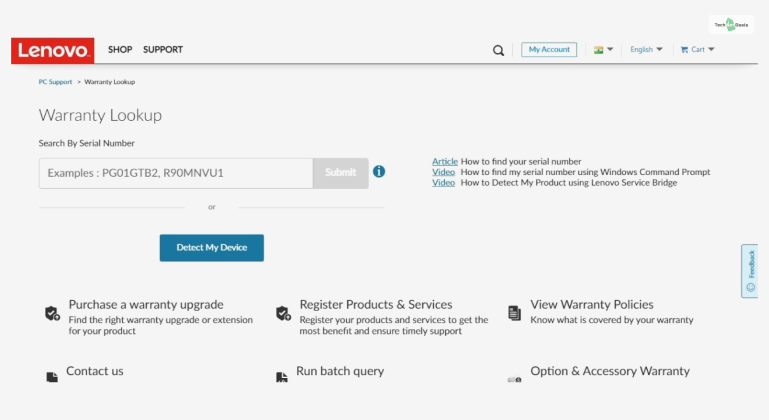
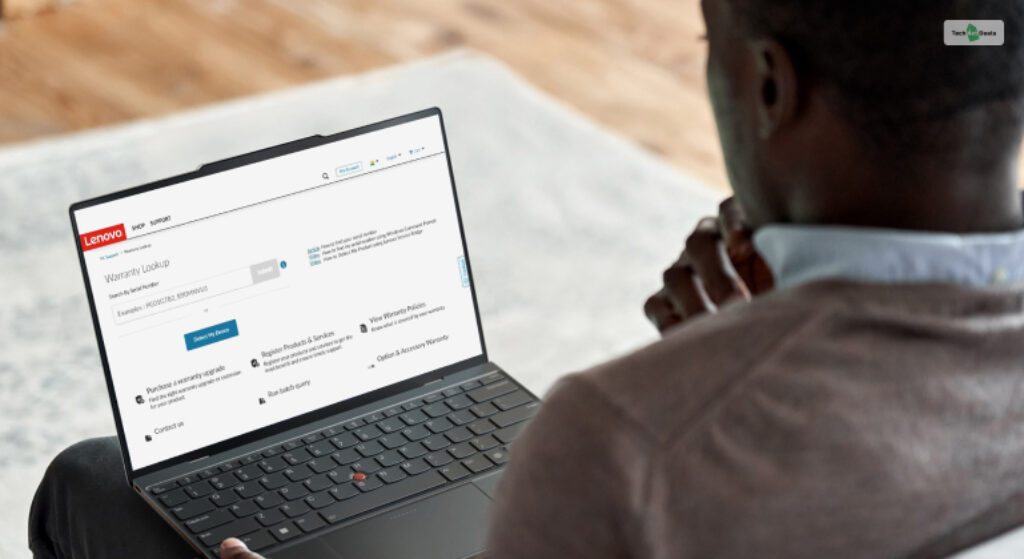
One of the easiest ways to check Lenovo Warranty is to do so online using the Lenovo Warranty Check tool. This tool is basically a webpage on the official Lenovo web page that allows you to Lenovo bulk Warranty Check.
To use this tool to check Lenovo warranty status, there are a few simple steps that you must follow. However, you must first find out the serial number of your device.
If you wish to do so, then simply follow the steps as explained below.
- First, go to the official Lenovo Website.
- Here, click on the Explore option, which you will find in the upper left corner of the screen. You will see this option has a logo with three horizontal lines.
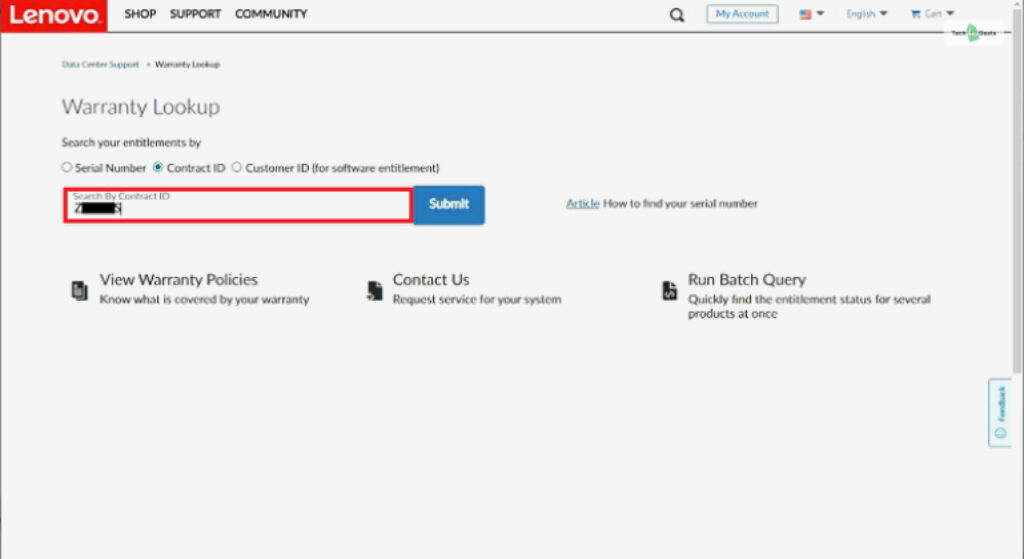
- After you click on the option above, you will find a lot of new options on the drop-down menu. From the new options, click on Warranty Lookup.
- When you click on the option above, a new web page will open up. Here, you will need to input the serial number of your device.
2. Lenovo Warranty Check Contact
If, for some reason, the Lenovo Warranty Check-up method above is not working, then fret not. There is another method available for Lenovo warranty status checks.
In this method, instead of checking your Lenovo Warranty status from the main website, you have to do so using the Lenovo Service Bridge tool.
However, remember that this method is only exclusive to Lenovo laptops. You will not be able to use smartphones, and other devices will not work with this method. Therefore, this makes this an essential Lenovo laptop buying guide.
If you wish to do so because the previous (and recommended) step didn’t work out for you, then all you need to do is simply follow the steps as explained below:
- First, go to the official Lenovo Website.
- When you enter the home page of the website, all you need to do is scroll down the page. At the bottom of the page, you will see an option called Support in blue. Click on it.
- When you click on the Support option, some new drop-down options will appear. Here, you must click on Contact Us.
- Once you click on the option above, a new web page will open up. Here, you will have two options to identify your Lenovo device – Detect Product or Browse By Product.
- However, you will not be clicking on the second option here. Instead, you need to click on the first option – Detect Product.
- After you click on this option, you will get the option to install and use the Lenovo Service Bridge. Click on the box beside “I have read and agree to the Lenovo Service Bridge Terms and Conditions and the Lenovo Privacy Statement” to tick mark it.
- Once you do so, the Lenovo Service Bridge application will automatically be installed on your system.
- After the app is installed, double-click on its shortcut button (it will appear on your desktop screen).
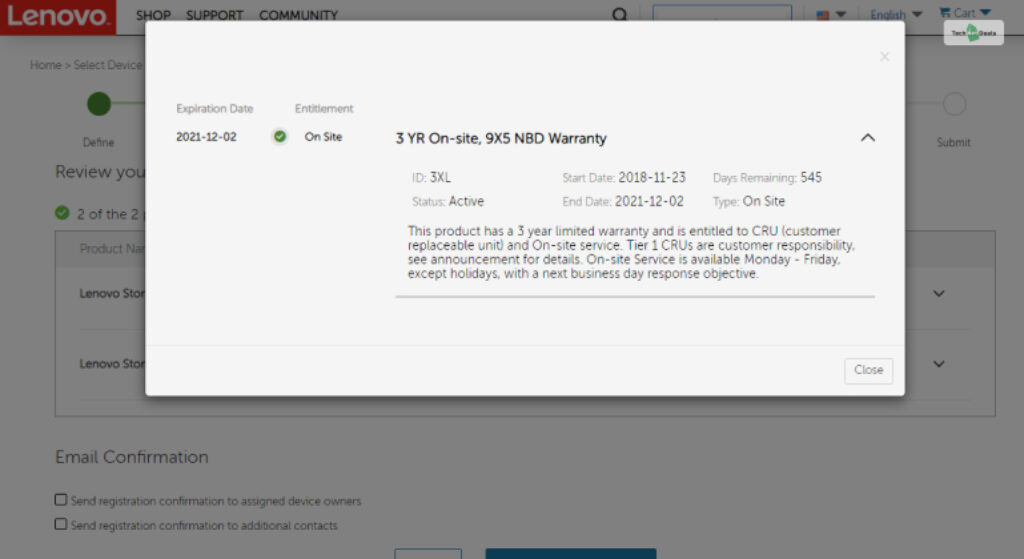
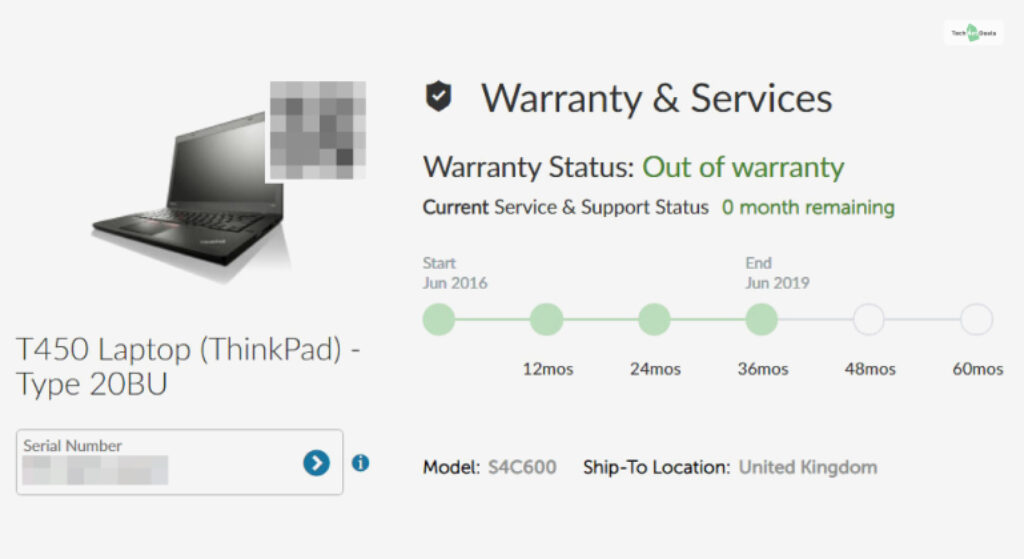
- As the app opens up, it will automatically scan your device to give you all information regarding it. Here, you will get your Lenovo laptop serial number as well as your Lenovo Warranty Status as well!
How To Extend Lenovo Warranty?
Yes, you can extend the warranty period of your Lenovo device if you wish to.
In this regard, Lenovo offers you three different types of warranty extension options that you can choose from. These four types of Lenovo warranty extensions include:
- Warranty Upgrade: This is a basic warranty period extension. Here, you can extend your base warranty period (1 year by default) by two more years. This warranty gives you free service against unexpected costs of repair and replacement.
- Accidental Damage Protection (Laptop Only): This is a laptop-exclusive warranty that protects you against costs for damage due to accidental liquid spills, electrical surges, bumps, and more.
- Premium Care Support: This is what I call a “Premium Lenovo Customer.” Having this premium support allows you to reach out to customer care and get your queries solved faster, as your request will be placed on high priority.
- Vantage Smart Performance: Another laptop-only warranty extension, this allows Lenovo to automate fixes for any issues your laptop faces at periodic intervals. This is done through the Lenovo Server Warranty check.
If you wish to extend Lenovo Warranty period for additional coverage, you can do so by:
- First, go to the official Lenovo website.
- There, on the home page, you will see an option called Services and Solutions on the menu bar at the top of the page. Click on it.
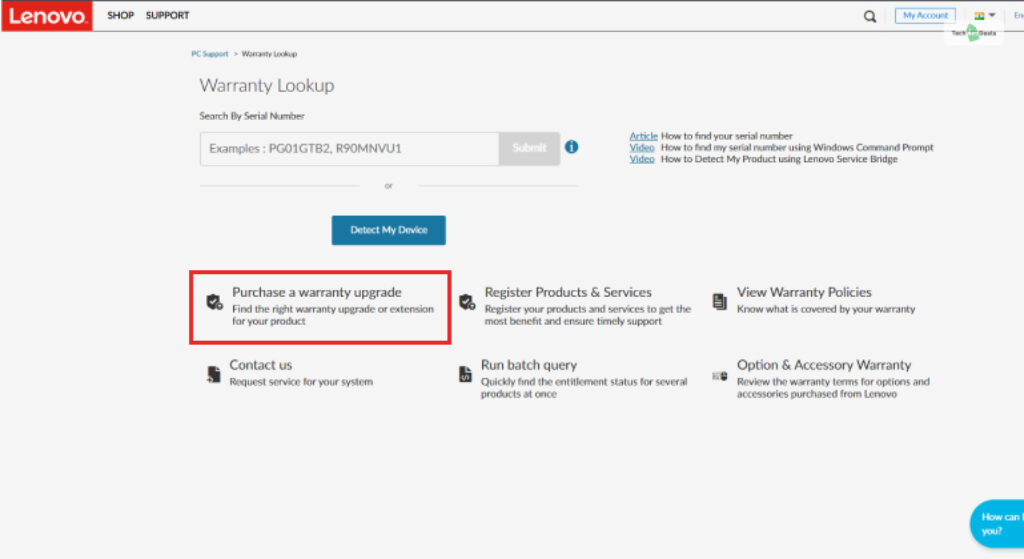
- Now, when the new web page opens up, click on the Warranty Lookup option (which has a shield icon). You will find this when you scroll down to the bottom of the page.
- When you enter this page, click on the “Purchase a Warranty Upgrade” option.
- Now, enter your product serial number and select the warranty upgrade you want!
Conclusion: More Warranty, Fewer Worries
Learning how to Lenovo Warranty check will help you find out how long your warranty period lasts. It also helps you check what benefits you can avail of under this warranty coverage. Plus, you can extend it anytime you want!
Therefore, I hope reading this post has given you some insight regarding your Lenovo Warranty. If you have any queries, comment your worries down below!
More Resources: